Category: Sidesaddle Blog

  • Fixing a Flat Tire

    First, here’s some general information about tires:

    Since tires are your only contact with the road, it’s important to make sure they’re in good working order. Inspect them regularly for cuts on the tread or sidewall. Small cuts can hold shards of glass or thorns, which can eventually cause a flat tire. Big gashes can allow an inner tube to ooze through. Nothing’s as frightening as having a front tire blow out while you’re blasting downhill. The rear tire will wear faster than the front tire, since it bears more weight and is the driving wheel, so watch it carefully.

    Inflation pressure is also important. Proper pressure keeps the rolling resistance of the tire low and helps avoid flat tires caused from rolling over uneven surfaces. The recommended inflation pressure is printed on the sidewall of the tire.

    Use a hand bicycle pump or a floor pump to inflate your tires. Most floor pumps have gauges built into them. If you use a hand pump, use a gauge to verify the pressure. Check your tires before each ride.

    Tires that have never been used can still go bad. They dry out and lose their elasticity, so they crack and puncture easily. Replace your tires annually. It’s a cheap investment.

    Fixing the flat:

    To fix a flat, you’ll need a few tools: tire irons, a patch kit, a pump, and some arm muscles. (See, cycling [b]is[/b] good for upper body strength.)

    The first thing to do is to remove the wheel from the bicycle. If it’s the front wheel, it’s a cinch – release the quick release and remove the wheel. The rear wheel is ornery because you have to contend with the chain and the rear derailleur. Before removing the wheel, shift the chain until it’s on the small sprocket on the back and the small chainring on the front. Then loosen the quick release and slide the wheel out. If the rear derailleur cage holds things back, just pull the cage gently downward and rearward to get it out of the way.

    The next big project is to remove the tire from the rim of the bicycle wheel. You’ll probably need a set of tire irons to do this. Sometimes, if the fit is loose enough, you can work the tire off with your hands, but you’ll usually need tire irons. Start on one side of the tire and work it off the rim, using the tire irons to gently pry it over the rim. Be very careful not to crimp the inner tube in the process. Once this side is off, you can reach in and remove the inner tube. Make sure you take off the plastic valve cap and the small nut on the inner tube valve before removing the tube. Now, remove the other half of the tire.

    If you watch others fix a flat, you may notice they don’t take things apart as completely as you are. You can get away with less, like just pulling out the tube where it’s punctured if you want to repair it and you know where the puncture is. The point of this exercise is to learn about the makeup of a wheel, so that’s why you’re now holding an inner tube (punctured), a tire (punctured or possibly worse), a wheel, and maybe a rim strip (wondering what the heck it is and where it came from).

    The rim strip is a strip of plain rubber or adhesive backed cotton that wraps around the rim to protect the inner tube from the sharp edges of the rim where it’s drilled for the spokes. Adhesive backed cotton strips are preferable because they don’t migrate and they have a very long life. Rubber strips can move around and eventually dry out. Make sure the rim strips fully cover all of the spoke holes, or this could cause future flats.

    You have two options now: you can repair the damaged tube (see the instructions that came with your patch kit), or you can use the spare inner tube you always carry with you. Regardless, make sure the culprit that caused this flat isn’t still with you. Start with the tire. Check it inside and out for a tack, shard of glass, whatever. If something’s still embedded in the tire or floating around in the casing, you may have another flat in avery short time. Try to find the damaged area. If it’s small, you can usually ignore it. But if it’s large enough for more debris to enter, you should patch the inside of the tire.

    It’s a good idea to look at the tube, too. It can give you a lot of information. Flats aren’t always caused by events on the outside. They can be caused by aliens on the inside. For instance, if the rim strip has moved out of place, a rough spot on the rim may rub against the inner tube and eventually puncture it. If the puncture is on the outer circumference of the inner tube, the culprit came from the outside; if the puncture is on the inner circumference, it came from within the rim. In any event, make sure you know what the cause is so you can finish your ride without more problems.

    Reassembly can be a breeze or a bear. Start by making sure the rim strip is on and straight. Then put one side of the tire back on the rim. Put the inner tube back in, starting with the valve and then work the entire tube back in place. (Sometimes it helps to keep the tube slightly inflated, but let all of the air out after the tube is in place.) Keep it straight and untangled. Here comes the breeze or bear part: starting at the valve, using your thumbs, begin working the last side of the tire onto the rim. Check the valve occasionally to make sure it points straight toward the center of the hub. Also make sure the tire bead is seated in the rim at the valve. If you push the valve back into the tire, it will make room for the tire to “seat” itself properly.

    By the time you get about half way around the rim, it’s going to get harder to slip the tire on the rim. Make sure the tube is completely deflated and work the tire opposite the hard spot down into the channel of the rim to give you as much “slack” as possible.

    It will be very tempting to use a tire iron to pry the tire back on, but you really shouldn’t because this will inevitably pinch and puncture the tube. If you must use a tool, use one like the Crank Brothers Speed Lever. With this tool, you can pry the tire onto the rim without hurting the tube. The best situation is to use your hands, but sometimes you can encounter a very difficult fit–the rim is just a little too large and the tire is just a little too small and the result is misery and frustration. Be patient. People have been known to flag down passersby on the theory that two pairs of thumbs are better than one.

    Don’t use a gas station air hose to inflate your bicycle tires–the air goes into the tube so quickly that it can blow out the inner tube–car tires have much more volume than bicycle tires. Ever try to inflate a car tire with a bicycle pump?

    No pump? Take out the inner tube and stuff the tire casing with leaves, grass, or newspaper. Ride very slowly and walk all your turns! Hole in the tube too big and you have no spare? Cut the tube in two, tie a knot at each end, reinstall and inflate at a low pressure. Tire casing gashed? Use a dollar bill, duct tape, or an old tire casing to make a boot.

    Practice makes perfect, so you may want to try taking the tire and tube off your wheel and reassembling it. Better to learn about the snags in the privacy of your own home than under duress in a rainstorm!

    Tailwinds,

  • Bicycle Frame Geometry

    Frame geometry, loosely defined, is all about the lengths and angles of a bicycle frame. It’s important because it determines how the bicycle will perform as well as how it will fit you. Sometimes it’s easy to look at the most obvious aspects of frame geometry (how long is the top tube and what is the standover height) and forget about the rest. Understandable, because we (the manufacturers) don’t always do a good job of explaining the rest to you and what it means. This gets a little dry, but bear with me.

    So let’s start with frame angles: the seat angle and the head angle. The seat angle is the angle between the top tube and the seat tube. The head angle is the angle between the top tube and the head tube. For typical road bicycles, the head angle is between 71 and 74 degrees. The head angle, in combination with the rake, determines how the bicycle handles. Steeper head angles, like 74 degrees, are usually reserved for bikes that are very manuverable, like criterium bikes. On the opposite end, shallower head angles are found on touring bikes where, in combination with a long rake, they provide stable handling.

    The seat angle isn’t quite as sacred as the head tube angle, but it sure has important implications for fit because it determines whether or not you’re going to be able to get in the right position relative to the pedals. Seat angles range from 72 to 74 degrees with 73 degrees being the most typical. Note that by moving the saddle back and forth on the rails, you can effectively change the seat tube angle a couple of degres. Once the seat angle is greater than 74 degrees, the geometry really puts the rider in an awkward position relative to the pedals. Unfortunately, some designers manipulate the seat angle to make the top tube shorter. To easily visualize this, imagine a bike with a 90 degree seat angle (i.e., the seat tube is vertical). Yes, the top tube is really short, but at the expense of a good fit. Steep seat angles also tend to give a rougher ride: imagine sitting on a pile driver.

    Another dimension most geometry charts mention is the bottom bracket height. This is the distance from the ground to the center of the bottom bracket. You’ll find higher heights on bikes where pedaling through corners is important (like bikes used in criterium races) and lower heights on bikes where a low center of gravity is important for maintaining stability (like touring bikes). Because the bb height can vary a little depending on the tires, some manufacturers also publish the “drop”. This is the vertical distance from the wheel axle to the center of the bottom bracket. It’s a fixed number, so in manufacturing, bicycle frames are built to drop, not to bottom bracket height.

    No geometry chart would be complete without rake, which describes how much the end of the fork blades deviates from a straight line drawn through the head tube. Rake is usually in the 2 to 6 cm range. Rake doesn’t mean a lot by itself, but when manipulated in a trigonometric relationship with the head angle and the circumference of the front rail, you can derive the trail and the caster angle of the bike. When all bikes had 700c front wheels, trail used to be a hallowed indicator of how the bike would handle, but with the advent of 650c and 24″ wheels, it’s lost its luster. Caster angle is probably a better measure; caster angles in the 80 to 82 degree range give neutral steering regardless of the wheel size.

    Finally, there’s the chainstay length. You’ll find them in the 39 – 40 cm range on racing bikes, since this makes for a stiffer rear end that won’t twist under explosive acceleration. Bikes made for touring usually have the longest chainstays (43 cm +) for better shifting with wide range gearing and heel clearance for panniers.

    Hopefully this has given you a little more cycle savvy about frame geometry!

    Tailwinds,

    [attachment=0]signature.gif[/attachment]

  • Correct Bicycle Fit for your Upper Body

    One of the perks of my job is being able to escape to the Eastern Shore of Maryland for some sunny riding around Blackwater National Wildlife Refuge.

    On a recent trip, I found myself thinking about the “cockpit” of the bicycle, the area that encompasses everything from the saddle to the handlebars. Knowing when a bicycle fits your legs is straightforward. If you can clear the top tube by a reasonable distance, then you’re set. (Well, almost; that’s the topic of my next eLetter.) But it’s not so obvious with your upper body. And when you do try to tweak the cockpit to fit your upper body, just what do you tweak? The handlebars, the stem, the saddle? One of them? All of them?

    Dominoes. That’s what cockpit adjustments are like. You get something just right at one place, only to find out you’ve lost a once good position somewhere else. Just warning you!

    Let’s start with the saddle fore-to-aft position. You probably know you can move the saddle back and forth on its rails. You want to do this to get your knee in the proper relationship to the pedal. Commonly accepted wisdom says that when you are seated on the bike, with your feet in the clips and the crankarms horizontal, a plumb line dropped from the front of the knee of the forward-most leg should intersect the center of the pedal. Move the saddle back or forth until you’re in the right position.

    We may have just run into a bit of rough. It’s not unusual for women to find they can’t move the saddle back far enough. This is because women typically have long femurs. A saddle with unusually short rails can hinder a good adjustment as can a steep seat angle (greater than 74°) on small bicycles. Ever feel as though you’re always “pushing back” on the saddle? Setback seatposts are available with varying amounts of offset which may overcome this sensation.

    Now we’re ready to work on the handlebar end of the cockpit. When is the fit right there? When you can ride comfortably with your hands on the brake hoods. This means having control of the bicycle and experiencing no neck or shoulder pain. For many women we’ve fit, 50° seems to be the magic comfort number. This is the angle between your upper body and a horizontal line. More aggressive riders will prefer to lean forward more; really casual riders will prefer to sit up more.

    The stem: styles of stems vary from bike to bike, but most stems now have spacers which can be moved above or below the stem to change its height. The stem height is right when the handlebar is level with the seat. Again, there are exceptions: more aggressive riders like the stem lower; very casual riders like it higher. If the height is right, but you feel like you’re leaning too far forward, you may be able to shorten the stem to bring the handlebars closer. Likewise, if you feel “scrunched up”, you can put on a longer stem to move the handlebars away from you.

    The handlebar: often neglected because it doesn’t look like you can do much with it. We’ve found that most bike shops set up handlebars with the brake levers a tad low on the bar. This means you have an uncomfortable bend to your wrist while on the hoods. The handlebars can be rotated in the stem. If you rotate them up slightly, it can make a world of difference in the way the bike feels. Not too far, though, or it’s awkward getting at the brake levers from the drops. To learn more, check out my video on How to Adjust Your Handlebars.

    I left out one factor in this discussion: your physical flexibility and your core and lower back strength. I didn’t pay much attention to it myself until a few months ago, but now I’m sold. The more flexible you are and the more strength you have in your core and lower back, the easier it is to maintain a variety of positions. That’s a subject unto itself!

    I hope you’ve found these ideas helpful, whether you’re trying to get a new bike to fit well or just polishing up your position on your current one.

    Tailwinds,

  • Bicycle Fit: Start Here in Your Search for Performance

    by Gary D. Hughes, Ph. D.

    Gary Hughes is a bicycle fit specialist and owner of Bodacious Bicycles in Easton, MD. He offers the three levels of bicycle fitting mentioned in this article, and he repairs, rehabilitates and builds frames and complete bikes. He is also a Terry bicycle dealer. Gary can be reached at gdh@bodaciousbicycles.com.

    It happens about this time every year – the thoughts of bicycling enthusiasts everywhere turn to France. For every year the Tour de France captivates us as the world’s most elite riders demonstrate nearly incomprehensible feats of human endurance, suffering, performance and power as they circumnavigate France in their quest for the yellow jersey. As the Tour showcases the very best in human conditioning techniques and bicycling technologies it motivates us to improve our own cycling performance.

    Form, Fit and Function

    Because different forms of bicycles perform significantly better on different types of stages (i.e. mountainous, flat, or time trial), each rider needs to use a number of different bikes to remain competitive over the whole course of the Tour. Imagine if you could select from an assortment of different length legs before setting out on a hike. You could put on longer legs for those days on the flats and then shorter ones for the mountains. Your friends could never keep up with you! More importantly, you could essentially eliminate the risk of repetitive use injury by ensuring that the applied loads never overly stressed your joints, tendons, muscles and bones. Of course realizing all of these benefits supposes that the right length of legs was selected for that day’s terrain and that the legs were sized to fit you perfectly. Otherwise this bionic entity couldn’t function optimally. You would find yourself moving awkwardly (wasting energy and possibly falling) and risking the development of a repetitive use injury (by repeatedly exerting forces on your body that it was not designed to support). This same logic applies when you strap on a bicycle. For it to function properly, it needs to have the right form and fit.

    Striking the right balance takes real science. Hence, Tour teams extensively use wind tunnel tests and computer modeling to optimize the performance of each individual bicycle-rider system. The ultimate goal is create a fit that allows the rider to deliver maximum power and control the bike while still being able to maintain a highly aerodynamic position for the duration of the stage.

    As riding enthusiasts, we too face tradeoffs. This starts with selecting the form of bicycle that will function best for the type of riding we will be doing. And selecting the right form nearly always requires some level of compromise. It also requires careful introspection. Why do you want to ride? It could be for some combination of relaxation, socializing, transportation, competition, travel, physical fitness, general health, or other reasons. Will the terrain be predominantly mountainous, hilly, flat, or mixed? Is the surface going to be dirt trails, country roads, the beach, or city streets? Is your riding style performance, touring or recreational? Answering these questions honestly and correctly will go a long way in helping you determine whether a road, hybrid, mountain, time trial, cross, triathlon, city, touring, cruiser or some other type of bike is best for you.

    For any bicycle-rider system to function optimally, the bicycle must properly fit the rider. And the more riding you’re going to do, the more critical it is that your bicycle fits you correctly. That’s because with a properly fitting bicycle, you can enjoy riding until the point of exhaustion. You will want to spend more time and miles on your bike, because you’ll be able to enjoy the whole ride. Conversely, if you were to ride a bicycle that doesn’t fit your properly you’d find yourself becoming quickly uncomfortable, soon in pain, and working harder than you need to get to where you want to go.

    The key to enjoying a lifetime of bicycling is to ensure that a good fit exists between you and your bicycle.

    Bicycle Fitting

    Bicycle fitting is an inexact science. There is no set of formulas that can completely define the ideal size and contact interfaces for any given rider. Rather, it is largely an empirical process that works by progressively approaching a perfect fit. The objective is to get the fit close enough to perfection for the rider to be able to repeatedly enjoy her cycling experiences and to ensure that she is efficient and safe in doing so.

    Three parts of the body contact the bicycle: hands, feet, and bottom. Bicycle fitting involves determining and setting the median positions of these contact points relative to one another in space so that the rider can perform optimally. In other words, this defines how far the handlebars are in front of the saddle as well as how far above or below they are. It also sets how far the pedals are from the saddle. More specifically, this position defines how far the saddle is above and behind the axis around which the pedals rotate (bottom bracket). Taken together, the positions of these three points provide necessary, but not sufficient, information for specifying the proper frame size.

    Each of the three interfaces needs to be defined, but they cannot be defined independently of one another. For instance, how a cyclist will orient herself on a bicycle saddle depends, among a long list of other things, on how far she is leaning forward, and that depends on how far forward the different contact points for her hands are on the handlebars. This interdependence means that if you want to change the handlebars, you may find that you also need to change the saddle.

    The first step in fitting a saddle requires selecting a suitable one. This selection process should start by narrowing the options under consideration to only those that will support the rider without putting undo pressure on sensitive or vulnerable parts of the anatomy while allowing the rider to pedal naturally and without chafing. Comfort can then be considered, but it should be assessed in the context of riding style. For example, cushy saddles might feel more comfortable than firm ones on short rides, but perceptibly less so on longer rides. Other factors to be considered include whether the saddle needs to be tilted and whether the seatpost supporting the saddle should be rigid or suspended.

    Handlebar selection presents a similar number of options. This too starts with selecting the right category of handlebar: mountain, road, aero, etc. Within each of these categories, there are options. For instance, with road bars there are different widths, reaches, and drops to consider. It is also important to consider where to position the brake levers and gear shifters. Then there are the pedals. Again, there are a lot of options to consider. Some options deserving of consideration include the length of the crank arms (this defines the diameter of the pedaling circle), how far the pedals are mounted from the center of the frame, the type of pedal, the amount of float, and where cleats are mounted on the rider’s shoes.

    Finally, there is one other consideration that a bicycle fitting must address in setting up these contact interfaces: the symmetry of the rider. Is one arm significantly longer than the other? Is one leg longer than the other? Or does one or both of their feet exhibit some degree of forefoot varus? Or is there some other anomaly? If so, these conditions need to be accommodated.

    Repetitive Use and Repetitive Use Injuries

    Bicycling is an athletic activity in which you repeat the same biomechanical motion over and over again for the entire ride. How many times you repeat that motion depends on how far you ride, the terrain you are traveling over, and whether you tend to mash your pedals or spin them. Although both mashing and spinning expend the same amount of energy to maintain a given bicycling speed, they exert different loadings. Mashers pedal slower but push down on the pedals harder with each stroke; spinners pedal faster but push less hard on the pedals with each stroke.

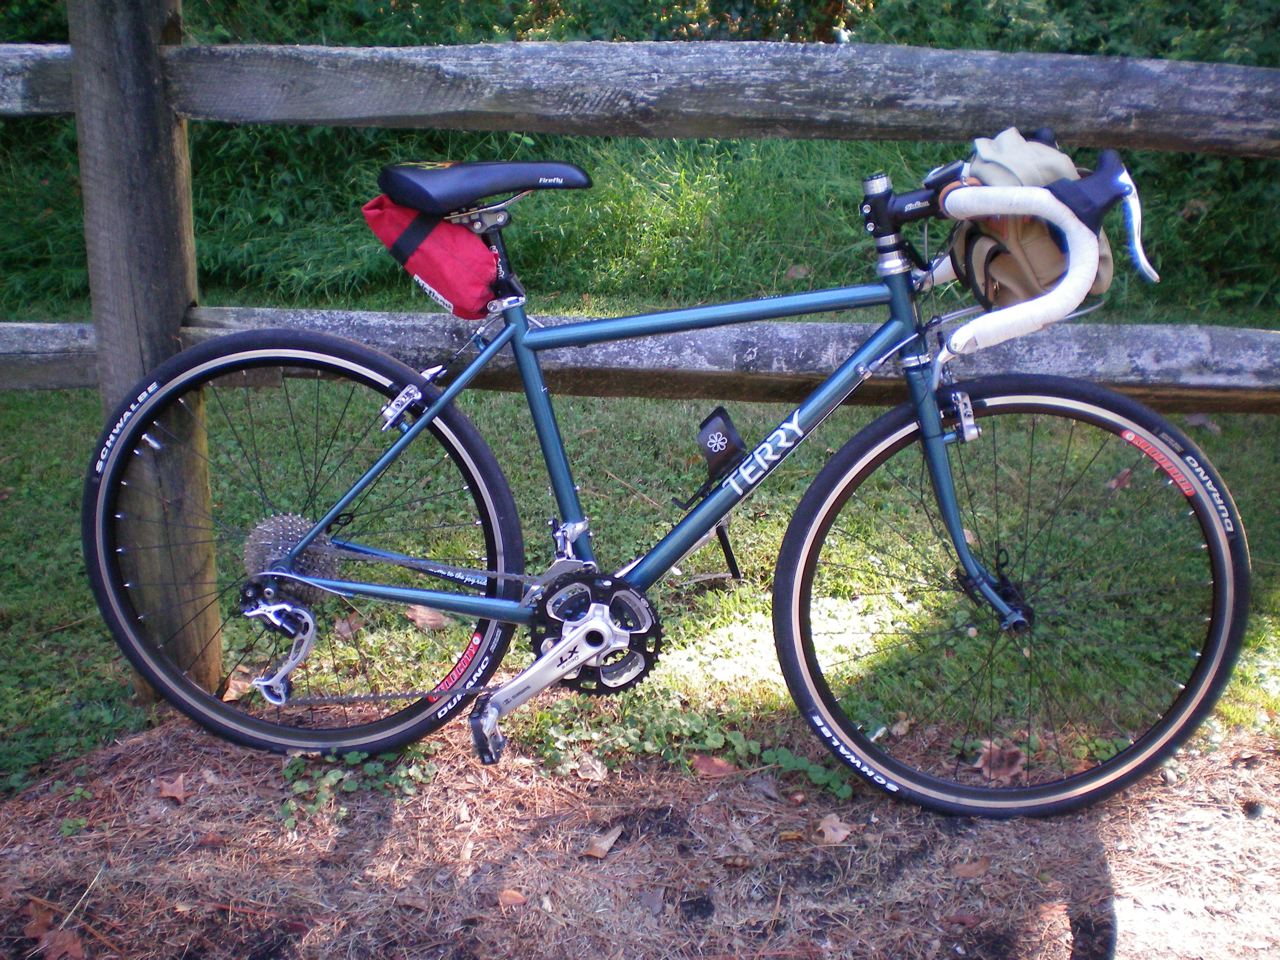
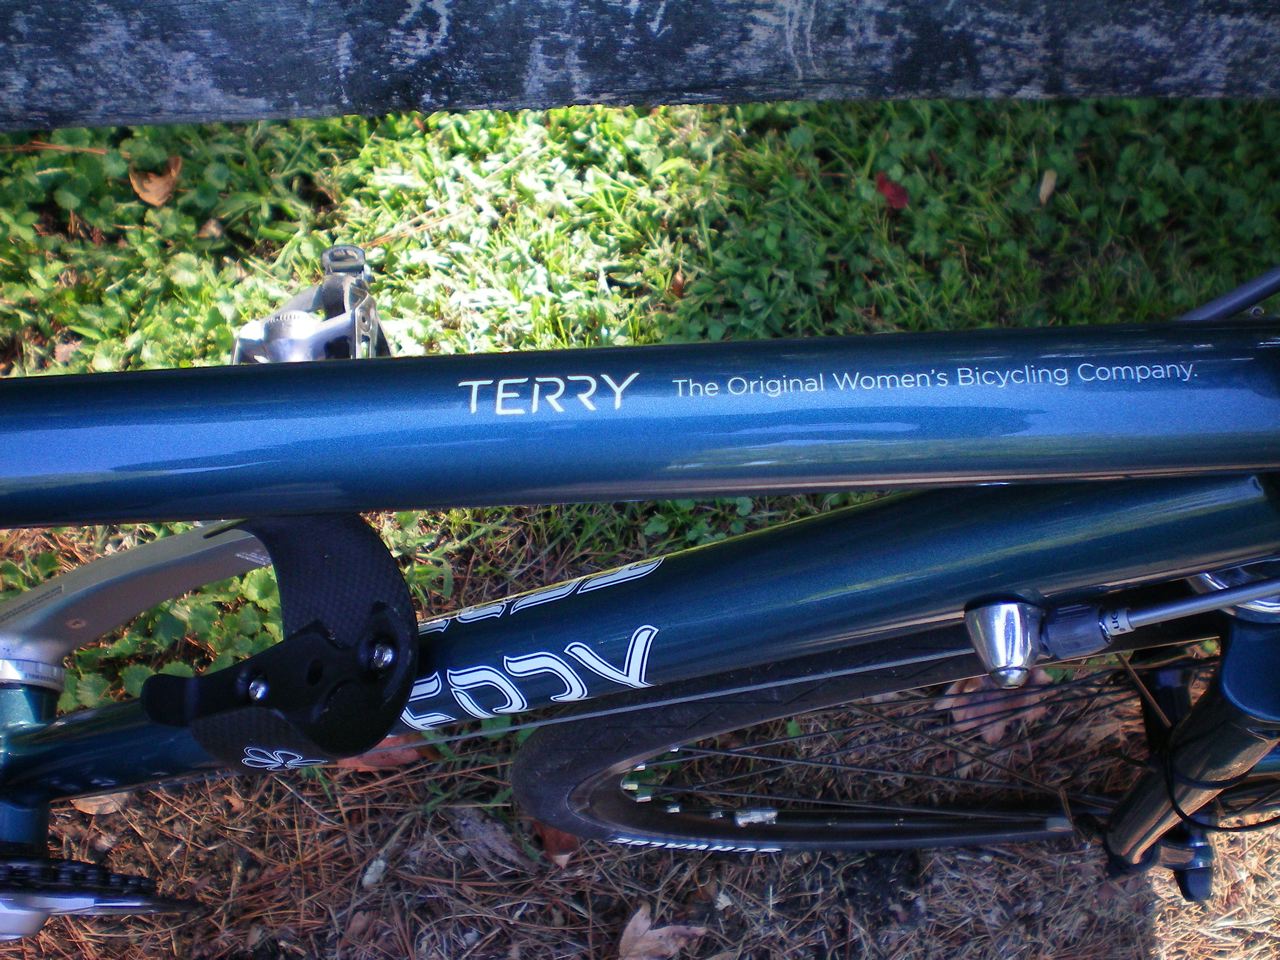
    To get an idea of the range of numbers involved, imagine two riders both riding Terry Isis Pros on this year’s Wild Goose Chase Metric Century and averaging 16 mph. Since the course was flat and ignoring the wind (which is of course like ignoring the proverbial 800-pound gorilla in the room), it might be reasonable to assume that both riders stayed in the one gear for the duration of the ride. Let’s say the masher stayed on her large chain ring (50 teeth) and a middle cassette cog (16 teeth). Her cadence would then have had to be just over 60 rpm for her to maintain 16 mph. By the time she finished, she would have applied over 14,700 pedal rotations. In contrast the spinner would have likely stayed on her small chain ring (34 teeth) and a middle cassette cog (17 teeth). With that gear selection, her cadence would have had to be just below 100 rpm and she would have needed over 23,000 pedal rotations to finish.

    Both, either, or neither of these riders could develop a repetitive use injury. Imagine sanding a piece of wood. You can remove about the same amount of material with fewer strokes by applying slightly more pressure. That’s analogous to what happens when a load, however small, is repeatedly applied in other than the way your body is built to support it. Body parts rub against other body parts or the bike in ways that cause irritation. And continuing to repeat the offending motion will cause the irritation to progressively intensify as it continues to be re-aggravated before it can heal. Left untreated, this is likely to grow into a chronic or serious health problem.

    Is there a lower limit to the onset of repetitive use injury? Probably, but it’s substantially below the numbers derived above in the Wild Goose Chase example. Consider that repetitive use injuries can occur from walking, and that the average person takes approximately 4,000 steps a day. The masher in the previous example would have surpassed that number of pedal strokes before reaching 11 miles. And once an irritation has formed, it takes but a few additional repetitions of the offending motion to re-aggravate it.

    The best way to avoid repetitive use injuries and get the most pleasure and fun out of your time on the bike is to have a bike that fits you properly. And the best way to ensure the bike fits you properly is to visit a certified bike fitter, who can assess your needs and riding style and adjust your bike to meet your specific needs.

    Adjusting the Bicycle to Fit You

    In the foreword to Andy Pruitt’s Complete Medical Guide for Cyclists, Chris Carmichael describes how, as a young racer, he had found himself suffering from severe knee pain. As a result of this he visited Andy Pruitt, who diagnosed him as suffering from iliotibial (IT) band friction syndrome and prescribed a treatment that quickly stopped the pain. However, what impressed Chris Carmichael most was not that Dr. Pruitt alleviated the pain, but that he determined and corrected the source of Carmichael’s IT band affliction—his riding position. After Dr. Pruitt showed him how to modify his riding position, Carmichael never again suffered from IT band friction.

    That is exactly the sort of experience I get to witness regularly in my work as a fitting specialist. Clients are typically experienced cyclists with thousands of miles logged. But either they can’t seem to get comfortable on their bicycle or they are beset with lingering injuries. Surprisingly, a quick fitting session often uncovers a serious problem with their current fit. Occasionally there are telltale hints, like a saddle angled up or down by 30 degrees, or handlebars wrapped in three-inch-diameter pipe insulation. Other times, it takes a bit more detective work. In either case, clients are typically amazed that by simply changing some of the components on their bicycle or inserting a spacer under one of their cleats, they are suddenly able to start riding pain free again.

    Of course, sometimes the fit analysis leads to the conclusion that an altogether new bicycle is warranted. But even that is a relatively minor cost to pay for pleasurable, pain-free, efficient riding.

    Benefits of Fitting for Recreational, Touring and Performance Cyclists

    The ultimate goal of rectifying fit problems is to keep people from developing repetitive use injuries in the first place. And the real challenge here is getting recreational and touring cyclists to consider getting fitted before buying and extensively riding a bicycle. Imagine ordering clothes without knowing your size! Yes, you could hire a tailor to take in the pants or a cobbler to stretch the shoes, but wouldn’t it be a lot easier to buy the correct size to begin with? Unfortunately, recreational and touring cyclists often feel that they’re not into bicycling enough to justify getting fitted. Worse yet, they are more likely to attribute a repetitive use injury to their lack of training—and often try to grit their way through the pain, which can exacerbate the injury.

    They couldn’t be more wrong! Although it’s counterintuitive, a poorly fitting bicycle will become uncomfortable and potentially injurious for a recreational rider in fewer miles of riding than it will for a touring rider; and touring riders will become uncomfortable sooner than a performance rider. That’s because a performance rider applies more energy to the pedals. This tends to lift more of the rider’s weight off of the saddle and handlebars as well as forces the rider to lean forward more in order to maintain a smoother pedaling motion. In contrast, a recreational cyclist tends to sit more upright and supports more of their weight with their hands and bottom. And it’s critical to ensure that this weight is supported comfortably, as well as that this position allows the rider to use their natural pedaling motion.

    It is precisely because of this phenomenon that two riders with exactly the same physiques and conditioning can require their bicycles to be set up differently: one may enjoy performance cycling and the other recreational.

    Types of Fitting

    At Bodacious Bicycles we offer three levels of fitting. The first level involves taking a series of static measurements that will let you know if your current bicycle is approximately right for you. Alternatively, it could tell you whether a bicycle you are considering to purchase is likely to fit you. Basically, it gives you a good starting point. This may be all you need if you find riding your bicycle to be comfortable and responsive. If that is not the case, however, then a dynamic fit is in order.

    A dynamic fitting involves taking another series of measurements, but this time while you are pedaling. Going through this additional level allows your flexibility, riding style, and any existing conditions to be assessed directly rather than inferred from an interview process. By the end of this process, enough information will be generated to let us confidently modify the setup of your current bicycle or specify the geometry and setup of a new one.

    The final fitting level, performance fitting, is less about comfort and more about responsiveness and power. It focuses on how changes in your position and/or cadence affect your power output. In short, it provides a laboratory and the tools necessary to hone your performance.

    A short description of each of these fitting levels follows.

    Static Fitting

    The first level, static fitting, has two parts to it. The first part involves acquiring your skeletal measurements and ascertaining information about any pre-existing conditions and your riding style and expectations in addition to any issues, concerns, or complaints you may have about your current bicycle. This data is used to generate your developmental fit parameters and to recommend a particular bicycle geometry that will not only fit you well, but is also well suited for your riding style. The second part of the static fitting process involves measuring your bicycle and assessing its range of adjustability. A comparison of these two sets of data is then made to determine how well your bicycle fits you and how it might be adjusted to fit you better—or whether you should consider changing certain components, or even moving to a totally different bicycle. Every bicycling enthusiast should go through at least this “biomechanical” level of fitting to ensure her bicycle can deliver mile after mile of healthy and enjoyable riding.

    Dynamic Fitting

    The second level of fitting, dynamic fitting, builds upon and further refines the recommendations of the static evaluation. It also involves two parts. The first part has you riding your current bicycle on a stationary trainer. Measurements are taken to define the range of angular motion of your hips, knees and ankles. In addition, observations are made as to how you naturally posture your head and neck, arms, and lower and upper back, as well the degree to which you rock your hips while riding. The second part of this process gathers the same measurements and observations, only this time it’s on an infinitely adjustable bicycle simulator. The simulator is initially set to the fit recommended by the static assessment. These settings are then incrementally refined to dial in where you feel most comfortable. It also allows you to try different saddles, handlebars, and crank arm lengths. I always recommend this second level of fitting to anyone that is experiencing continuous and lasting discomfort when riding her current bicycle. It’s also best to get this level of fitting to try out new geometries before changing any components on your current bicycle or purchasing an altogether new bicycle — as might have been recommended by the static assessment. Dynamic fitting takes the guesswork out of your purchases, and by buying the right-size component the first time you almost always save money in the long run.

    Performance Fitting

    The final fitting level, performance fitting, is intended for people looking to improve upon their personal best performance — whether for a race, time-trial, club ride, century ride or just a loop around their neighborhood. Like the dynamic fit process, it involves riding both your current bicycle and the bicycle simulator; however, this time instantaneous and sustained power output are measured as a function of different riding positions and cadences. The performance fitting process starts on the simulator, where data can be gathered that will tell you how subtle seat and handlebar/aerobar adjustments affect your power output. The same thing can be done to evaluate the effect of different crank arm lengths and handlebar widths, drops, and reaches. It can also give insight into how you should position yourself for optimal power output in climbing, descending, and riding on level ground. Once this data is acquired it is then used to fine-tune your bicycle for a particular event. The performance fit process concludes with us monitoring your power output while riding your bicycle on a stationary trainer under simulated race/ride conditions. This allows us to precisely dial-in every adjustment on the actual bicycle you will be using for that particular event.

  • Crazy Chainrings

    It must be the mechanical engineer in me — when I started reading about Rotor’s Q-Rings, I was fascinated. To the point that my desk is littered with all kinds of studies and evaluations of this and other renegade chainrings.

    Not that they’re new — oval and elliptical chainrings pop up all the time. Here’s the basic concept: the oval shape changes the effective gearing. The drawing below will help you visualize what’s going on. Imagine a round chainring (black) that has 50 teeth. If we reshape it into an oval (red), then it behaves like a chainring with more than 50 teeth when it’s in the position shown in the drawing below. As it rotates 90 degrees, it behaves like a chainring with less than 50 teeth. Kind of like changing gears without changing gears…

    The most well-known oval chainring was the Biopace™ chainring from Shimano. The design of this ring attempted to relieve knee stress by changing velocity at different points in the pedal stroke by the way the oval was aligned with the pedals. The BioPace chainring was aligned just like the chainring in the drawing, slowing down the speed of the legs at the top and bottom of the stroke and discouraging hard pedaling in the middle ranges. In theory, this was easier on the knees, which are most stressed out when the leg is at a 90 degree angle.

    The older, elliptical chainring was aligned with the “fat” part of the oval in the horizontal direction to take advantage of the rider’s power when the pedals are in this position, but it put a lot of stress on the knees and contributed to a jerky pedal motion.

    In 2000, the “Osymetric” chainring was introduced. It’s neither oval nor elliptical, but uses two different kinds of curves, giving a constant change of radius, according to the designer. These rings were seen most recently in the Giro d’Itaia on Bradley Wiggin’s Felt DA team time trial bicycle.

    The Rotor Q-Rings™ are yet another play on the chainring egg game, with the added advantage of being able to tweak the orientation of the rings relative to the crank arms in order to maximize their effectiveness. Every rider’s pedaling style differs slightly, so it makes sense for the rings to be set to take advantage of this. In order to know exactly how to adjust the placement of the rings, the rider should have a Spinscan™ done to analyze her pedal stroke. There were several university studies done about the Q-Rings demonstrating that they may help a rider develop more power with a lower heart rate.

    Well, this is a lot to digest and probably raises more question than it answers, but it does make you realize that what seems so simple — namely, your feet making little circles — isn’t so simple after all. Add your legs to the equation and now you have a piston-like action mixed in with a circular motion. What if one leg has a different pedal stroke than the other? And how does this entire “linkage” change when you move back and forth on or in and out of the saddle? Plenty to think about on your next bicycle ride!

    Tailwinds,

  • Off to Headquarters!

    Most people think I reside in Burlington since that’s where our corporate headquarters have been for the last  year.  No, I still live in western New York and work remotely from my home office.  There are three of us in that situation.  We make the trip to Burlington several times a year to see familiar faces and get caught up in a whirlwind of meetings. Such was the case this week when Phil, our marketing analytics guru, and I jumped into a Jeep rented from Enterprise and hit the road. Kelly, our marketing communications manager, is a brand new mom, so she’s not taking any road trips right away! We left under sunny skies and were soon on our way on the NYS Thruway.

    Lots of snow everywhere but on the road.  And, yes, that very light cloud cover is our definition of a bright sunny day here in New York….

    Six hours later, we pulled into the parking lot at 47 Maple Street.

    Being Prez has its benefits!

    47 Maple is the home of JDK, our brand managers, Terry Precision Cycling and several other businesses. It’s a converted warehouse with tons of ambiance. The floors dip, dive and creak under foot. The exposed brick and massive steel beams are a reminder of the strength of the building and the wonderful times it has seen. (You know how I feel about steel!)

    Branding is everything.  Even the door into our office hasn’t escaped it!

    Yeah, baby!

    The first office you see when you walk in is that of our CEO, Liz Robert. That beauty of a bike is her new Fast Woman — a titanium version designed by me and specially built for us by Lynskey Performance.  (Gotta love anyone who works out of a glass office in full sight of the front door.  No hiding from or by this woman!)

    It’s all about the bike.

    Hugs all around for all the Terry employees who have been plugging away for the last year in Burlington and handshakes for the new faces we’ve only known as a voice over the phone. Winners, all of them! Later, we’ll relax and talk about things. Right now, it’s upstairs to “the roof”, where we’ll meet with our JDK brand managers to talk about progress so far.

    This is the view from JDK’s “roof” conference room.
    No time to enjoy the view. We have work to do. That’s Liz at the head of the table. Next to her is Michael Jager, one of the brainiest brand guys you’d ever want to meet.

    That’s how our whirlwind tour went — a series of meetings. Time flies when you’re with neat people and you can see the fruits of your labor.   But when evening comes and the building empties out, it’s time to relax with friends at one of Burlington’s great eateries. There are so many, it’s tough to choose one. Sigh — I wish we had that problem where I live!


    No explanation necessary.

    On the third day, we headed home, but not before a stop at our warehouse which is a few miles away from HQ.  This is where the rubber hits the road. Your orders are filled here by people who want to make sure you’re a happy customer. Theirs is a tough life and they do an amazing job for us.

    I’ll take the UPS orders; you take the USPS orders!

    Outside, snow was falling and the weather prediction was for a whole lot more, so we hit the road while there was still time to get out of Dodge. Sure glad that Jeep had four wheel drive!

    Slow going, but beautiful nonetheless.

    We arrived home safely and are looking forward to the next trip to Vermont under warmer conditions!

  • Born in the Bathtub

    Where have I been? I didn’t realize it was trendy to be born in a bathtub. I just figured it was the safest place in the house for a prototype Terry frame and fork built for me by Waterford. The cats can’t knock them over if they’re in the bathtub. And the bathroom doubles as my workshop. So this blog is about my bike, which was born in the bathtub.

    “My next bike” is always going to be my last bike. It will be perfect and there will be no need for another one. Thank goodness this is never true! Such is the life of a bicycle designer. We’re always trying to achieve perfection.
    I’ve been riding a beautiful Valkyrie Tour for the last year and enjoying it immensely. I’ve also been devouring Bicycle Quarterly back issues and enjoying them immensely as well. There’s a recurring theme that runs through this magazine: the idea that a well-designed bicycle is about more than just a good fit. It’s about harmonizing with the rider and playing the road like a bow plays a fine violin.
    How does this happen? Well, a lot of things come together in a very synergetic way. This bicycle doesn’t understand the word “stiff”. But it does understand that bumpy roads will beat you up and rob you of power. (And in the real world, every road is bumpy — just look at one closely in the late afternoon sun…). This bicycle believes it’s okay to “give back”, meaning a little frame deflection is a good thing. (Way too much to explain here, but see this site for a full explanation).
    I want this bike. I want to ride the rippling roads in my favorite haunt and feel them disappear beneath me. I want to stop reaching for a lower gear just because the road tips upward a bit. I want to get off the bike after six hours in the saddle and feel totally refreshed. Valkyrie is a wonderful bike, but its raison d’être is touring. It’s made for that rider who might load it up with 60 pounds of gear and hit the road for weeks at a time. It’s just a little too much bike for me, the 100 pound cyclist who’s no powerhouse, but who can go all day. It’s still a great ride…but it’s just not perfect.
    So, armed with ideas from Bicycle Quarterly, I called Marc Muller, the chief designer at Waterford, and together we came up with this magical bike. The frame geometry is quite similar to the Valkyrie Tour. But there’s some subtle stuff going on with respect to the tubing in the bicycle. My choice of components is part of the solution as well, with the tires being one of the most important. I also opted for the Nitto Randonneur handlebar on this bike. I was a little skeptical about the drops of the bar, which tend to flare outward a bit, but it feels great and works with the natural position of my hands. 

    I rode this bike for about 300 miles a few months ago and couldn’t wait to get on my rippled roads. Magic! I felt like I was floating over them, yet I was still firmly connected to the road (no bouncing around) and getting a good return on my energy investment. Riding into the wind, I was definitely working hard, but the push back was solely from the wind, not from the bike. There was also a day of riding when I was feeling a little out of sorts from a flu bug. The bike was reassuring even then — adapting well to my occasional sloppy riding, not chastising me for it. 

    And is this bike coming soon to a store near you? Well, I can’t guarantee that a particular store will carry it, but by early 2011, you’ll see it on our website, where you can purchase it directly from us. The name of this model? Precision. In tribute to the very first hand built Terry bicycle that launched The Original Women’s Bicycling Company!
    Tailwinds,
  • Lunch with Cy

    Monday, the day after the Wild Goose Chase, was a perfect kind of wind down day. Sunny and calm. The perfect day to ride with my friend Cy on some of the sweeter roads in the area and talk about what a great weekend it was and how much more we can do next year.

    It was hard to come home this time. It always is — that’s just the effect Blackwater has on me. How lucky I am to know that emotion. I think this visit was so special because of all the neat people who came back into my life after a long absence. You know how you can just pick up with old friends you haven’t seen in years? It’s like all those years just blew by. The familiarity hasn’t been lost at all.

    I met Cy many years ago when Terry first started doing one week bike tours in Vermont. Cy was a leader on one of those trips. If you had the good fortune to meet Cy at the Goose, you know what I mean when I say she’s just one of those really cool people you run across in life. A true free spirit. Our paths finally crossed again this August when Cy led our Terry Tour in Vermont for Sojourn Tours. I casually mentioned to her that she should hang out at the Goose on her way back south after the bike tour season ended. So, imagine my surprise when I was out riding Friday before the Goose and the cyclist approaching me turned out to be Cy! Ah, such is the nature of a free spirit.

    Then there’s my college roommate, Barb. So long, see ya after college graduation. Out of sight, but never out of mind. An email out of the blue a couple of years ago and the next thing you know, Barb volunteered to run registration at the Goose. Just picking up where we left off. Telling people about our incredible dorm room, Chips Ahoy in the middle of the night and way too much Gallo on the weekends. Hey, with a room like ours, it was the party room!

    Ride over, it was time for a very late lunch. Apples from New York and Vermont. Gu from….Gu. One of our super sponsors. And we didn’t forget the Raw Revolution energy bars. Many thanks to those guys, too. I wouldn’t trade cycling and old friends for anything. Life’s perfect combination.

    Tailwinds,

    Georgena
    georgena@terrybicycles.com
    www.terrybicycles.com

  • Baggage

    I can’t believe how much “stuff” I take on vacation. Just the electronics alone: 2 iPods™ (need a back up — no fun driving 9 hours each way with no tunes), an iPad™, an iPhone™, a MacBook Pro™, a digital camera, a Flip® video camera and all the necessary battery rechargers and AC/DC converters…oh, and a mouse because the trackpad makes me nuts after a while. Binoculars and field guides. 60 packets of Gu®, containers of Heed™ and Perpetuem™ and Recoverite™. Supplements, since it’s tough to eat right on the road and I need all the nutrition I can get for 10 days of riding. Oh yeah — clothes. Street clothes, bike clothes. And tools — in case I need to repair something. A spare wheelset. Helmet.

    And let’s not forget: the raison d’etre: THE BIKE!

    You know what? If I forgot everything except the bike, I’d still be happy!

    Tailwinds,

    Georgena
    georgena@terrybicycles.com
    www.terrybicycles.com

  • Freeing a Stuck Seatpost

    Last week, I began an overhaul of my hybrid bike, Moo. Moo is a very special bike. It began life as Mt. Marcy, our original mountain bike, named after the highest peak in the Adirondacks. When we decided to introduce a hybrid with a cow theme, Brian Moredock re-painted the bike and it became Moo. I have many fond miles on Moo and wouldn’t trade it for anything.

    Moo is very outdated, though. It was time for the 7-speed set up to give way to newer baubles, so hence the overhaul. As I tore the bike down, all went smoothly until I got to the seatpost. It wouldn’t budge. Moo is steel, the seatpost is aluminum. Jerry Kraynick, who owns Kraynick’s Bike Shop in Pittsburgh (and who is my bike mechanic mentor), claims that Archimedes said he could move the world if he had enough leverage. Like a lot of women, I embrace leverage wholeheartedly! So, it was off to the basement and the workbench vise to put leverage to work.

    Ah the beauty of steel. I could feel it springing under my coaxing, but the seatpost wasn’t impressed. Having built frames, I really didn’t feel comfortable applying any more torque to the frame than I already was. Brute force needed to give way to something else.

    In rapid order, I exhausted the easier possibilities: ammonia soaks (aluminum oxide hates ammonia), carbon dioxide blasts on the seatpost interior (aluminum contracts more than steel), prying apart the seat lug ears. Nada. I’d reached the bitter end: time to start cutting.

    I cut off the top part of the seatpost, leaving about 1/2″ exposed. Then, with a hacksaw, I started two cuts down the inside of the seatpost, 90 degrees apart. This was painstakingly slow and intense. My goal was to cut down as far as possible without cutting all the way through and slicing into the seat tube. So, I’d saw for a while, then blow out the chips and shine a light down the seatpost to see how I was doing. I was tending to hold the saw at an angle that meant I was cutting deeper toward the top of the seatpost than the bottom. This wasn’t bad, because I was able to pry the upper part away once the cut was deep enough. Just seeing some of the seatpost come free was encouraging. You know how you tear a piece of paper off a pad at the perforations? That’s what I was trying to do — get the aluminum down to such a thin piece that it could break away easily.

    After many, many hours of tediously sawing, checking, sawing, coaxing, sawing, checking and coaxing some more, the wedge finally broke loose and the remainder of the seatpost popped free! It was one of those moments I will cherish forever. A right of passage of sorts.

    Here are some photos.

    The first shows the two wedges — the smaller one on the left was the wedge I worked with.

    Here’s a shot of the interior of the wedges. If you look closely, you’ll see a little ridge on the outside edge of the wedges. This is just how close I was to the seat tube itself. It looks like about 0.5 mm.

     And here’s the source of the problem. Doesn’t look like much, does it? The inside of the seat tube is surprisingly clean; there’s just the normal oxidation I’d expect to see. My theory is that even though I greased the seatpost, by the time it slid into position, more grease was scraped off the bottom of the post than the top.

    These are the tools I used. The needle nose Vise-Grip was great for working in a small area. I chose an 18 tooth hacksaw blade because it cut a wider swath and gave my wedge a little more room to move…once it started moving. And I went for the expensive one!

    I blame myself for letting this happen. I habitually check the seatposts on all my bikes a couple of times a year to make sure they are lubed and moving freely. But somehow, I took good old Moo for granted. Big mistake! I think I’ll have a t-shirt made up that asks “Have you checked your seatpost lately?”

    Tailwinds,

    Georgena
    georgena@terrybicycles.com
    www.terrybicycles.com